Over the past few years, violent storms have blown through our neighbourhood, knocking down numerous mature trees. As a result, there is less shade on our dog-walking routes and less habitat for birds. Last summer (2023), I decided to plant new trees in our yard to make up for the trees that are now missing from nearby properties.
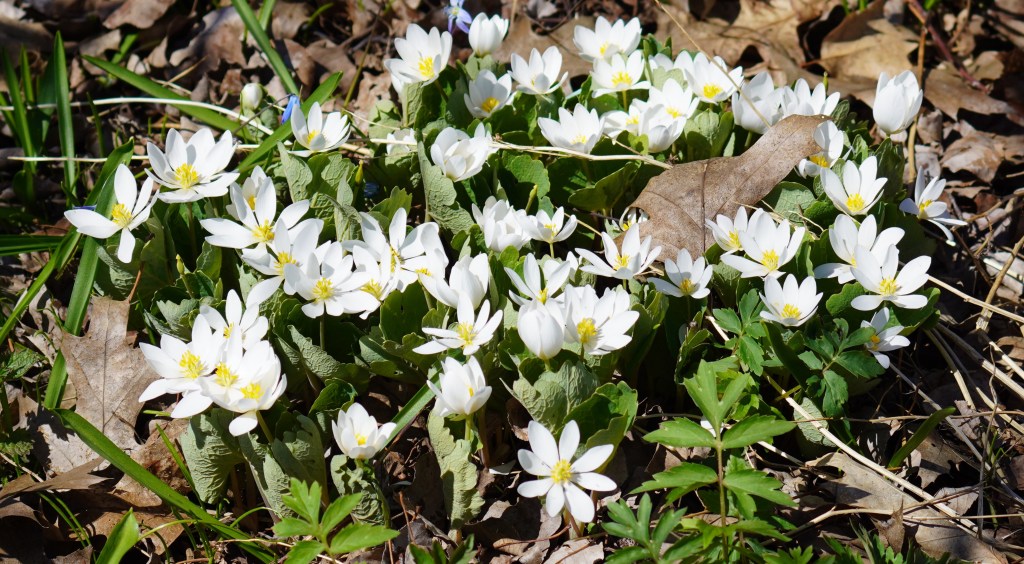
A patch of Bloodroot in the backyard shade garden that I expanded into a mini-forest (April 16, 2024).
Miyawaki tiny forests
I keep hearing about Mikawaki forests and mulled over how to carve out space for a mini forest in our backyard. Canadian Geographic has a useful article, The many benefits of the minuscule but mighty Miyawaki forests, by Alanna Mitchell, that includes an example 3 metre by 3 metre Miyawaki forest plan using native trees. So, I roughly divided up my space into 3 x 3 metre sections to estimate the number of trees I would need. I also found an informative blog post from the 1000 Islands Master Gardeners about Little Forests Kingston; it’s a good summary of the Miyawaki method and the potential benefits of little forests. (This is actually one of my favourite blogs, and I eagerly look forward to their weekly newsletter about ecological gardening topics.)
Mimicking local forests
Before I began planting my mini forest, I looked at lots of photos of forests that I’ve taken on forest trails, or that I found by Googling. I also searched for photos of Miyawaki mini forests.
It struck me that the Miyiwaki mini forests are very crowded and don’t look like natural forests with trees of different heights, some closer together than others. Miyawaki forests are like isolated forest ‘islands’ meant to be looked at from outside, not for sitting in or walking through. While I was inspired by Miyawaki mini forests, I decided to try to mimic the appearance of a real second growth forest instead.
Also, I noticed that Miyawaki mini forests are to be planted in full sun locations, isolated in the middle of an open field. Our backyard has some mature trees already casting varying degrees of shade. I also already have hedgerows surrounding the yard.
Preparing the beds
I already had a shade border with many native plants on one side of our backyard, so I expanded it to create the mini-forest. Last September, we removed most of our back lawn, leaving only a central path (to avoid muddy dog feet) and a central circle of grass for seating. All the bare dirt in these photos shows where we removed the lawn.

September 23, 2023: the mini-forest is ready-to-go for next spring.
An important step in Miyawaki forest plantings is to improve the soil. Since there are existing trees, I didn’t want to dig down, but I did add a generous layer of compost, followed by composted pine mulch — both from Greely Sand and Gravel.
Planting
I began planting a few of the trees and tree seedlings in September of 2023. The rest were purchased and planted in May and June of 2024. Because I’m a wing-it kind of gardener, I didn’t create a plan. I had vague ideas of what I wanted to achieve and figured things out as I went.
All the trees that I planted in the fall of 2023 were surrounded with chicken wire. Many of the pins I used to hold the chicken wire in place heaved during the winter, so rabbits ate some of the seedlings. I put chicken wire around all of the trees and shrubs this summer, and pushed the landscaping staples in at an angle. I plan on leaving it there for a few years. It is kind of unsightly, but I’d rather see chicken wire than chomped trees. If I had thought of it, I should have painted the chickenwire black so it would be less visible.
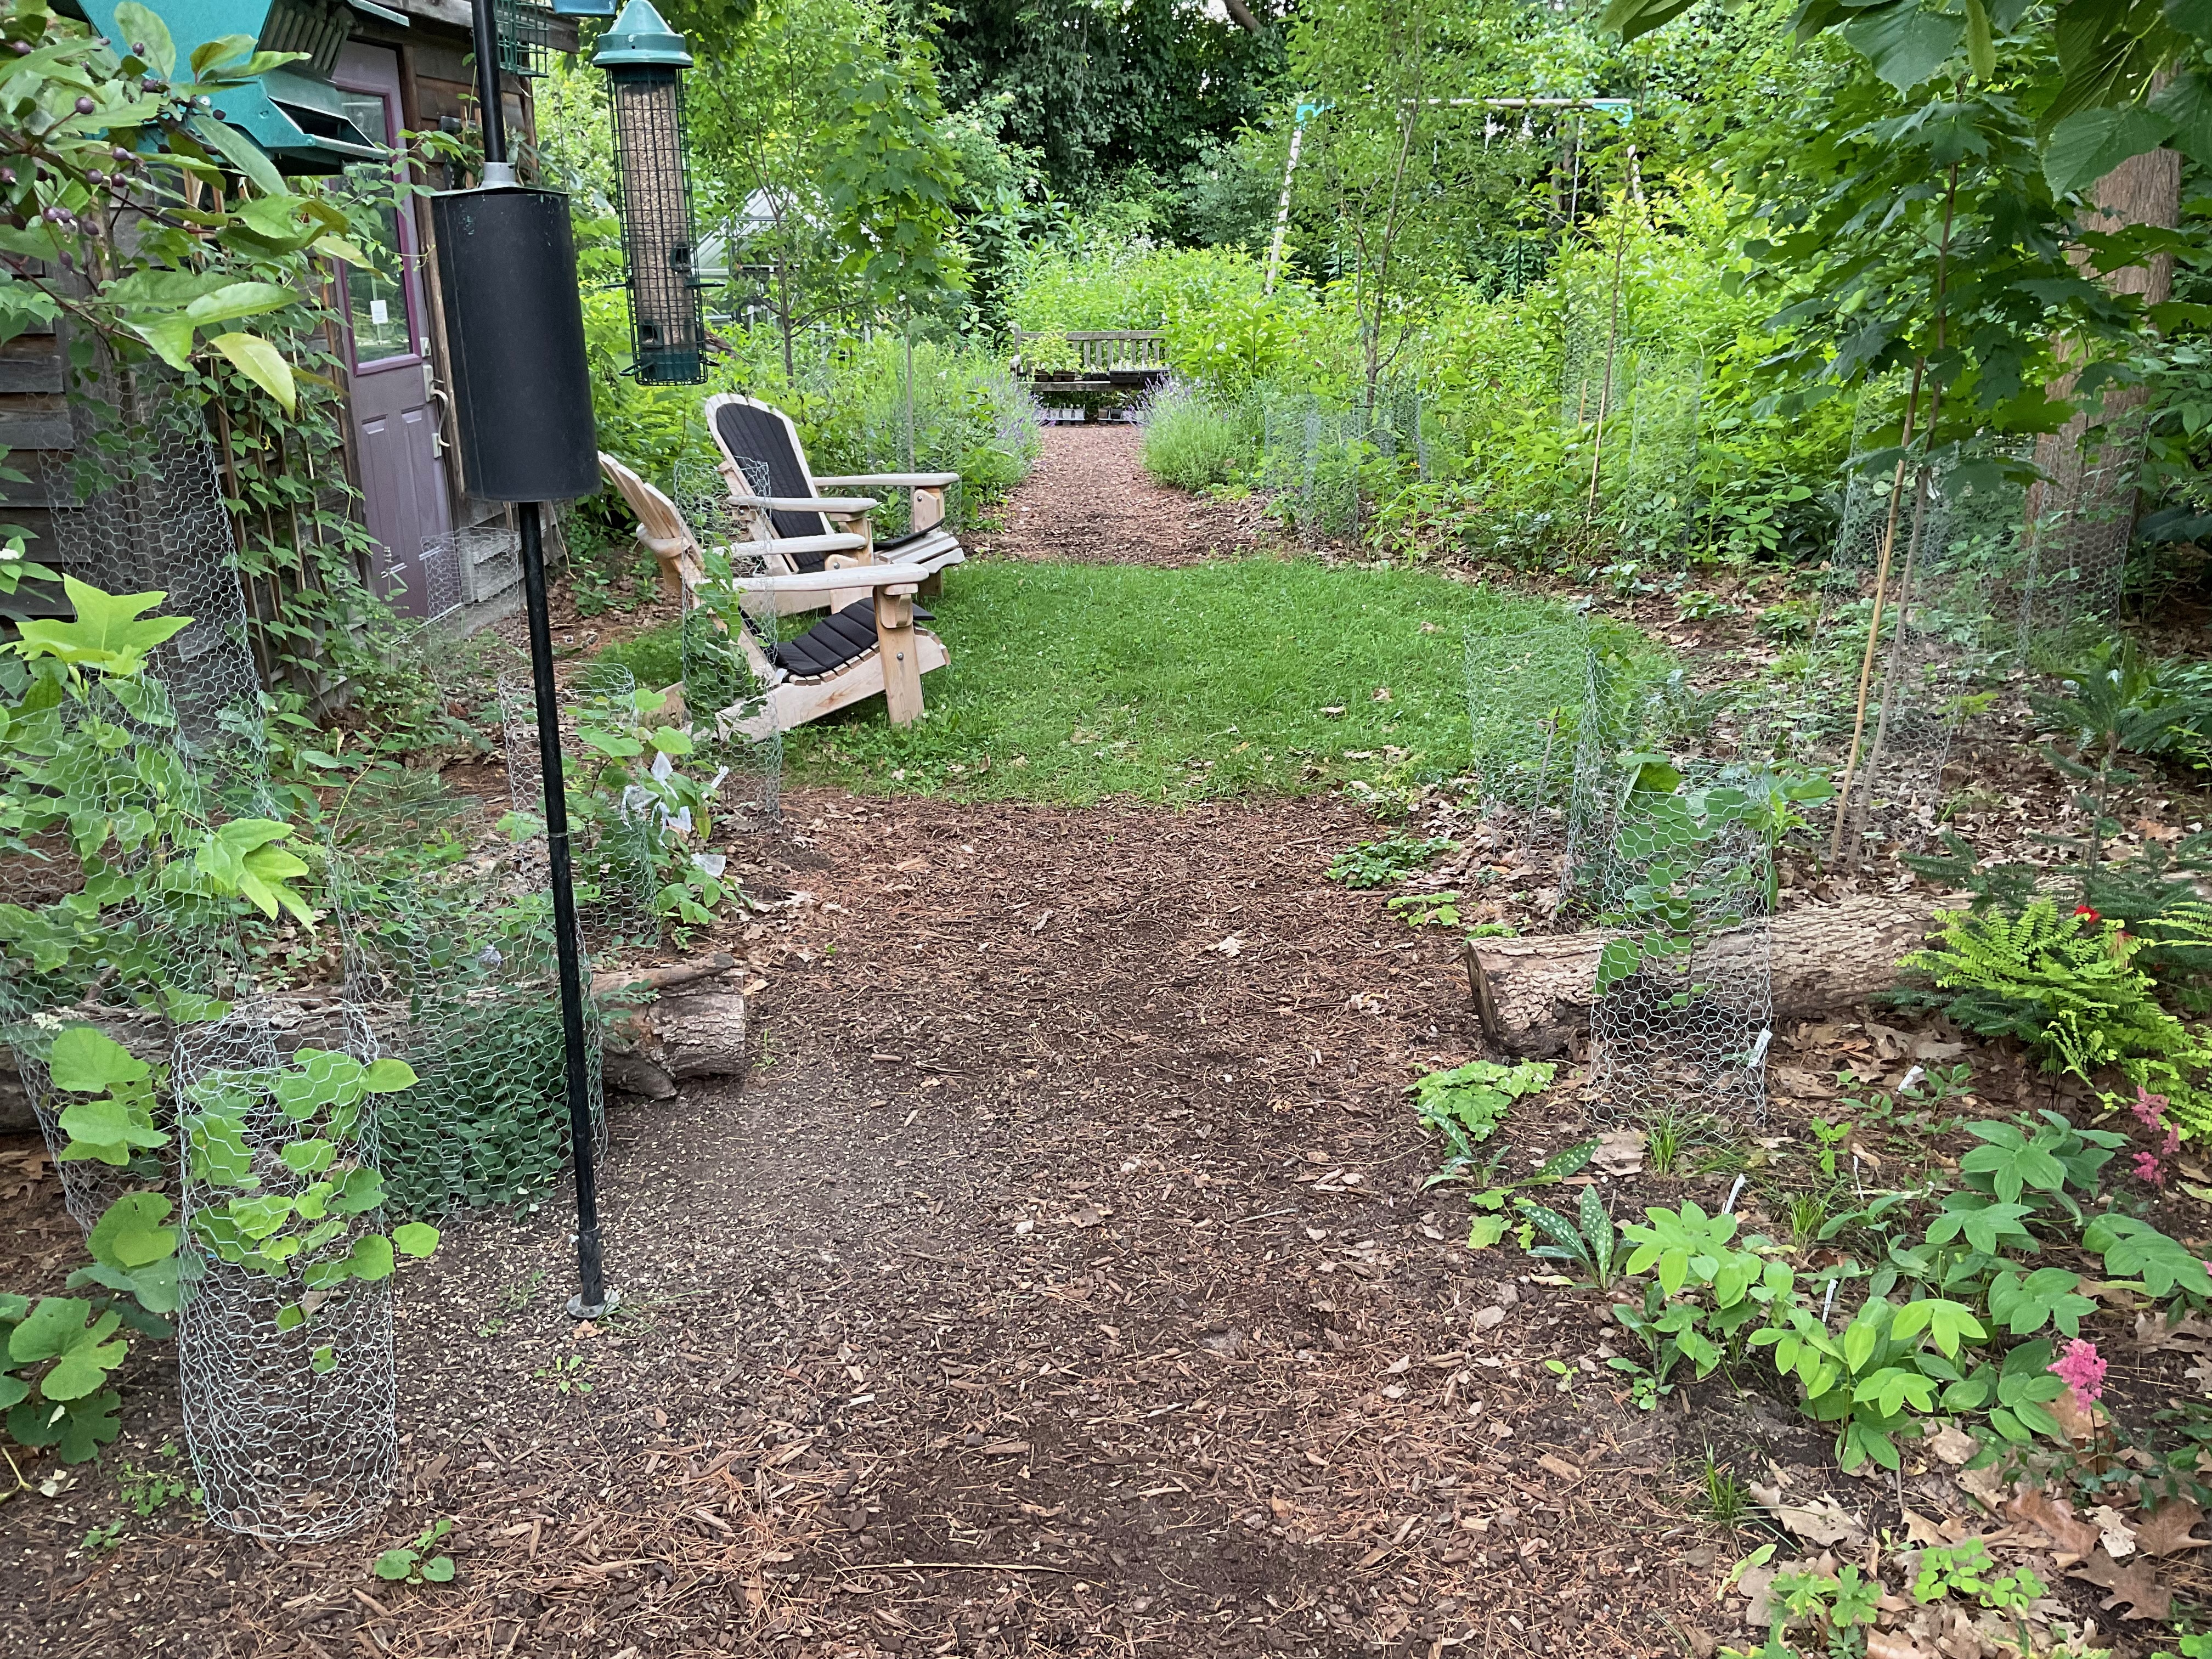


Mini forest almost fully planted, June 28, 2024.
From these photos, you can see that I abandoned the grass paths. They were a nuisance to mow and weren’t growing very well since all foot traffic was now concentrated on one path. I covered the paths with layers of leaf bags and mulch.
Chosen tree and shrub species
At first, I only picked deciduous tree species, but added in conifers after reading that some bird species (like Golden-crowned Kinglets) specialize in eating insects off of them. I chose the following large native tree species: 2 Sugar Maples (we already have a mature one), 1 Basswood (again, we already have a mature one), 2 Ironwoods, 4 Yellow Birches, 4 Hemlocks, a few White Spruces, 1 Balsam Fir, and 1 Tulip Tree (for my own amusement).
In the most sunny south- and west-facing spots around our seating area, I planted a Black Cherry, 2 American Mountain Ashes, 3 White Birches, and a Shagbark Hickory. Mature Ash trees used to provide shade here, but now we’re exposed to full sun. We had buy a shade canopy until the trees grow.
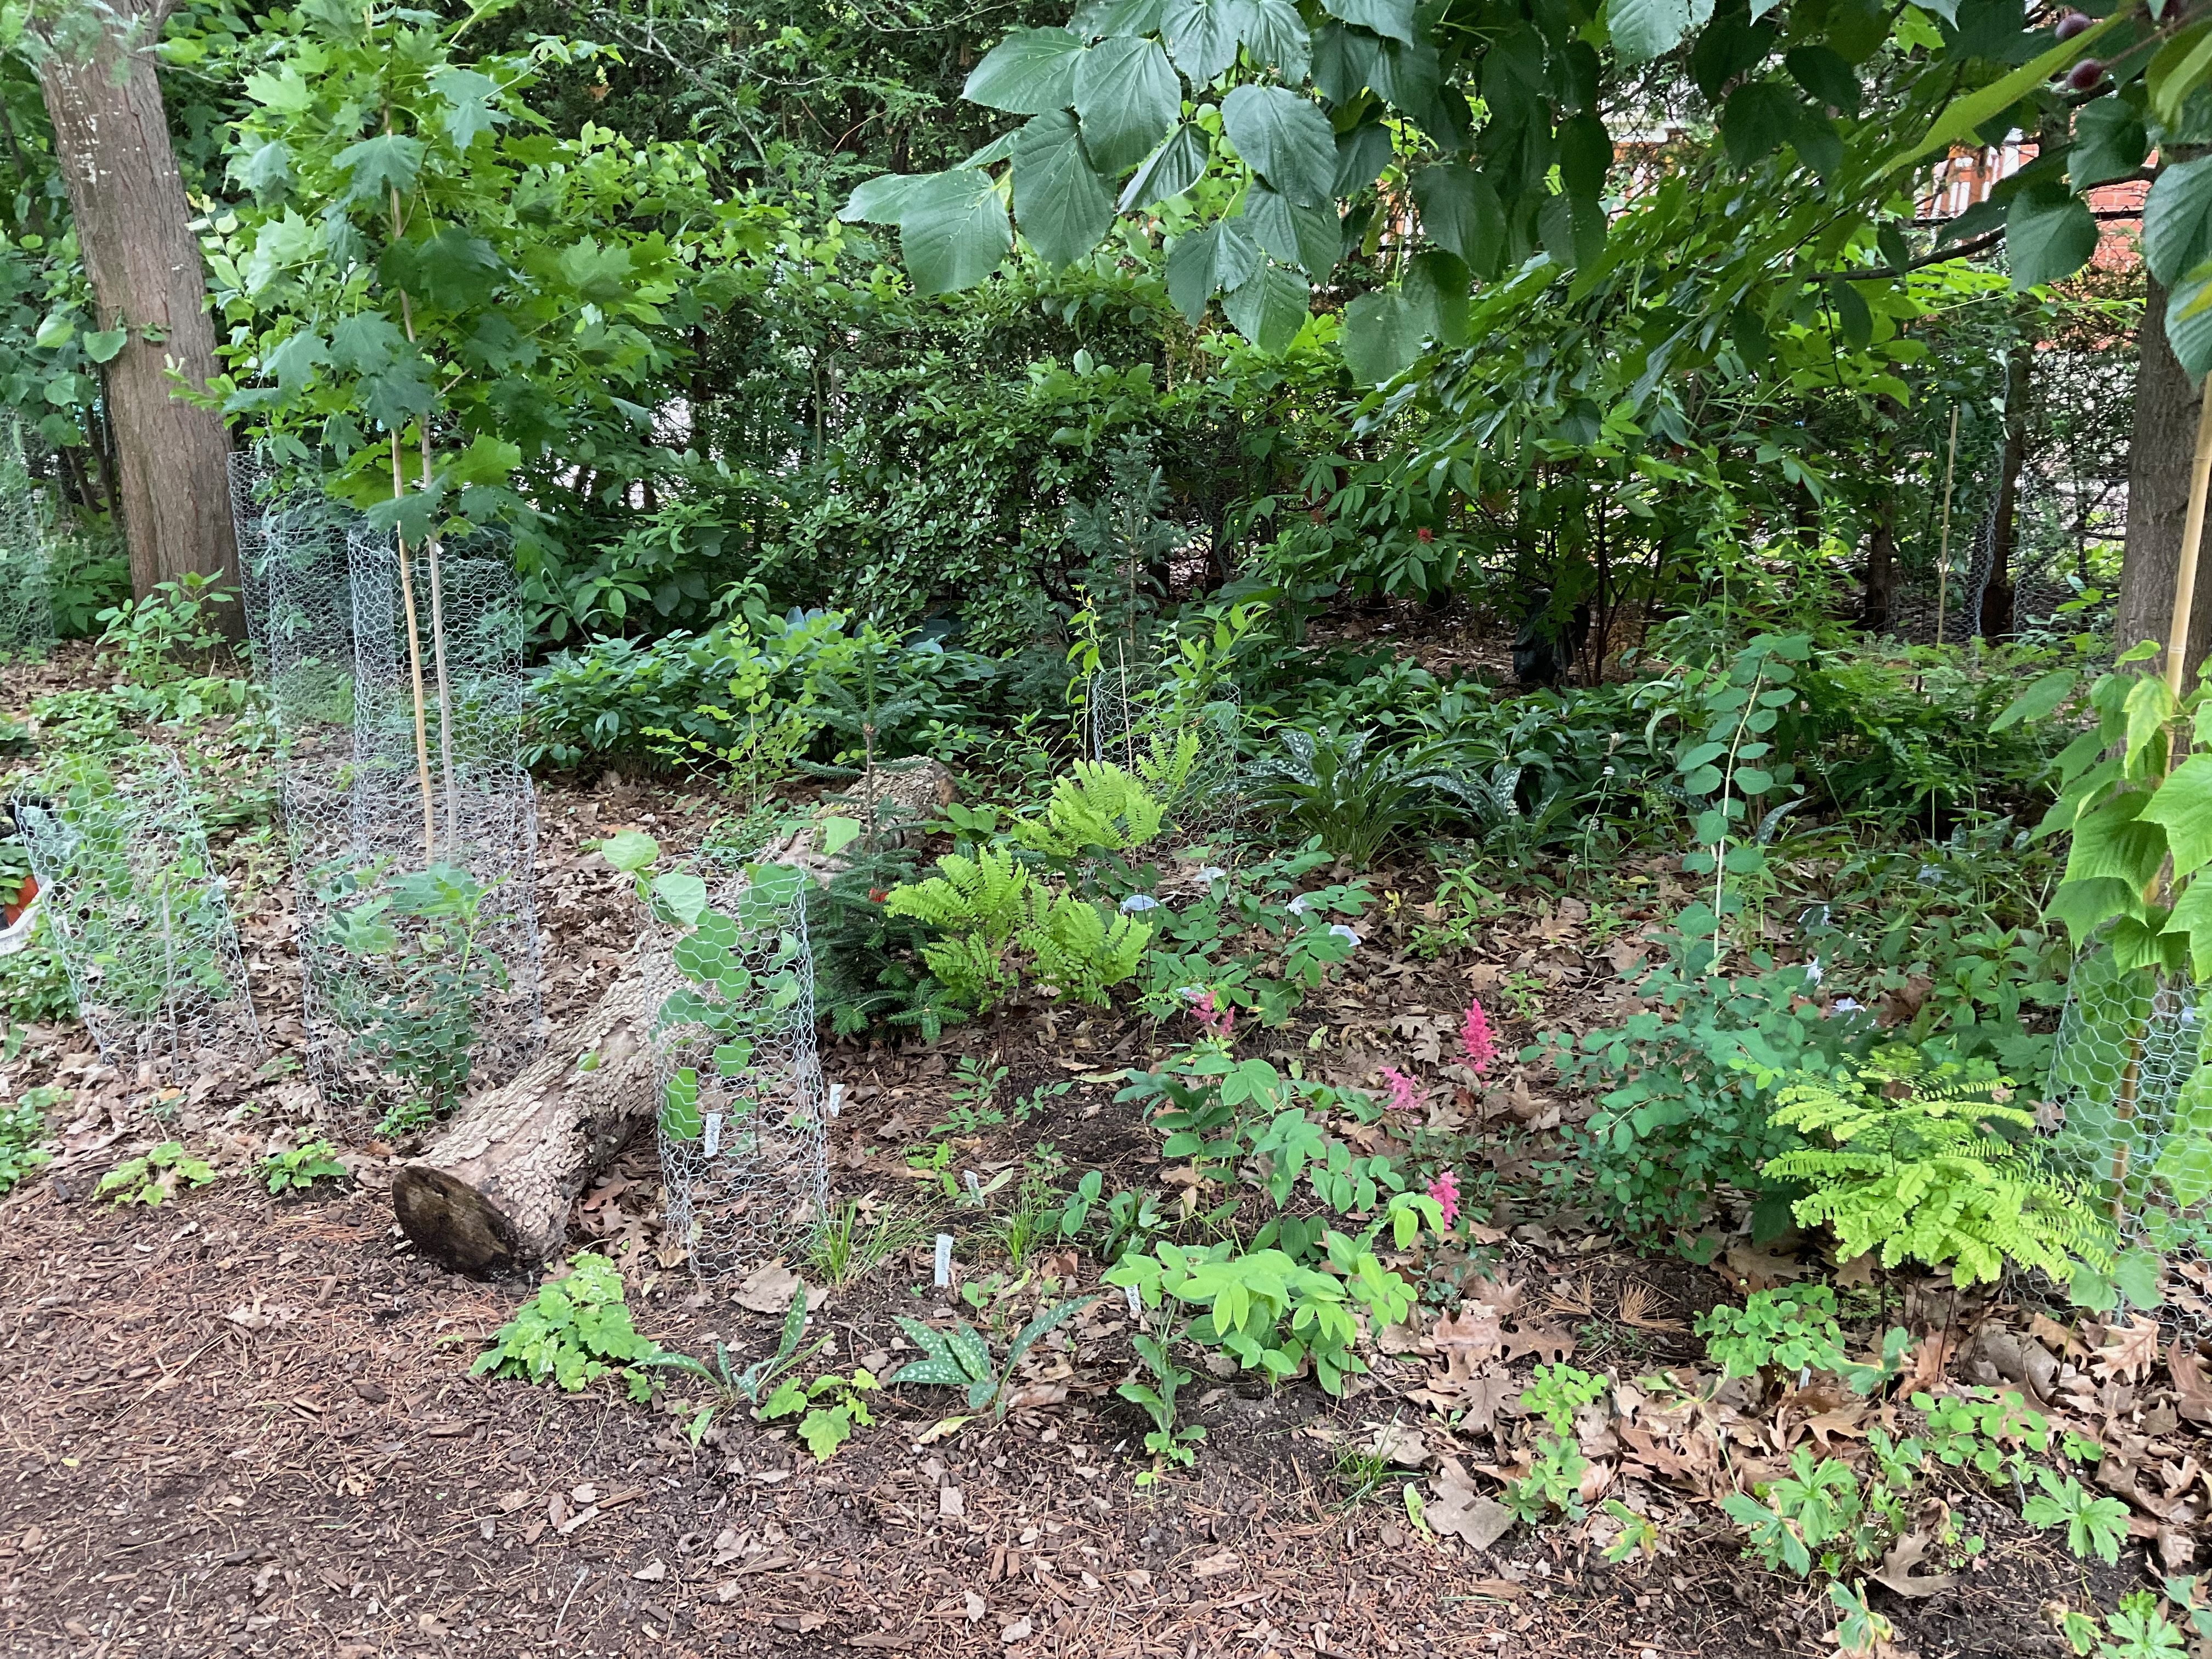
For understory trees, I added several Pagoda Dogwoods, 5 Redbuds to zigzag along the path, 2 Striped Maples, and a few Leatherwood seedlings (some of which were eaten by slugs already). I then added American Fly Honeysuckle and Snowberry shrubs.
Most native trees I found in conventional nurseries were cultivars and were in very big pots. I ended up buying smaller trees from native plant nurseries, all of which were outside of Ottawa: Ferguson Tree Nursery (Kemptville), Natural Themes Native Plant Nursery (Frankford), Trinkets and Thyme (Embrun), and Connaught Nursery (Cobden, on Facebook). A friend also gave me some small Hemlock and Fly Honeysuckle seedlings that she dug up before widening the road at her rural property. The tallest trees were 8 feet, while the smallest ones were only a foot tall.
Adding understory plants
I had already even adding native herbaceous plants to the existing shade border. I moved some more, and grew some from seed. For the past few years, my go-to source for woodland native plants has been Connaught Nursery. This year, I visited Natural Themes for the first time and found a great selection. I also bought a few from the Fletcher Wildlife Garden Native Plant Sale (Ottawa Field Naturalists’ Club) and onplants.ca. (In an upcoming blog post, I’ll tell you more about the spring-blooming native plants in my mini-forest because this post is getting long.)
Every year I grow native plants from seed. Although a lot of native woodland species are tricky to grow, I did have success with Wild Columbine, Bottlebrush Grass, Canada Honewort, Heart-leaved and World Wood Asters, Zigzag and Bluestem Goldenrods. I also moved naturally-occurring seedlings, such as Bloodroot, Wild Geranium, Red Baneberry, Jewelweed, and Virginia Waterleaf from other places in the yard. I’ve been collecting lots of seeds and I hope to have better success with germinating them using instructions from Wild Plants from Seed (by Ontario’s Krystal Walek and Graham Page) and Prairie Moon Nursery in the States.
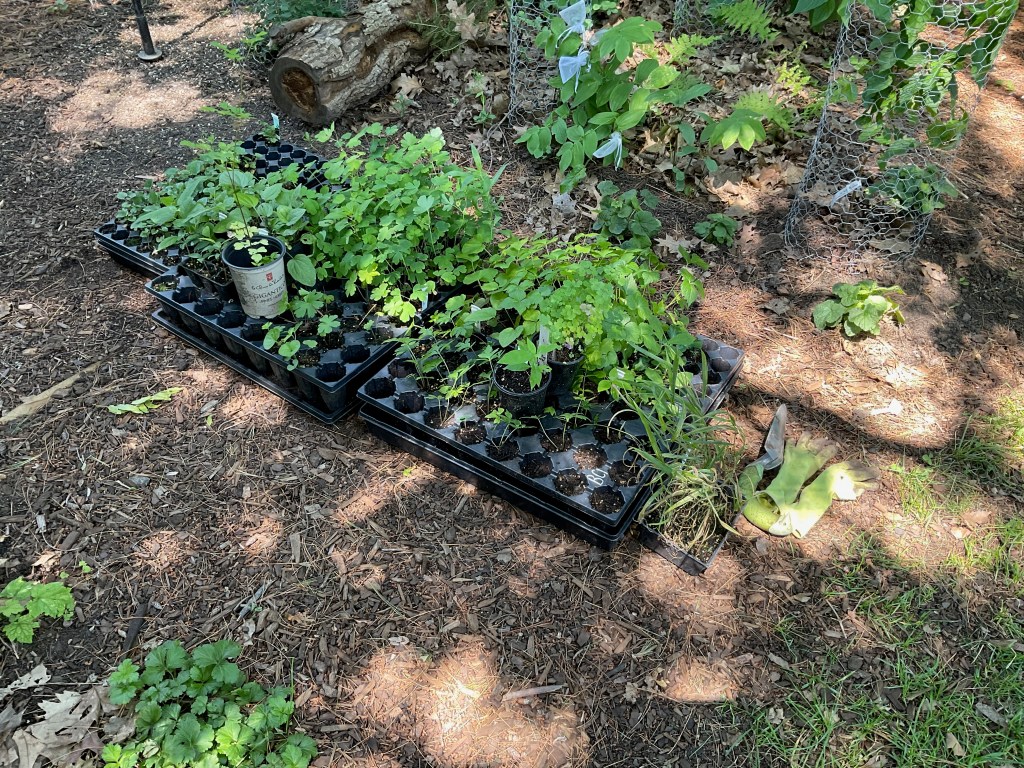


Some of the home-grown herbaceous native plant seedlings that I added beneath the trees, July 1, 2024.
Adding ‘fallen’ deadwood
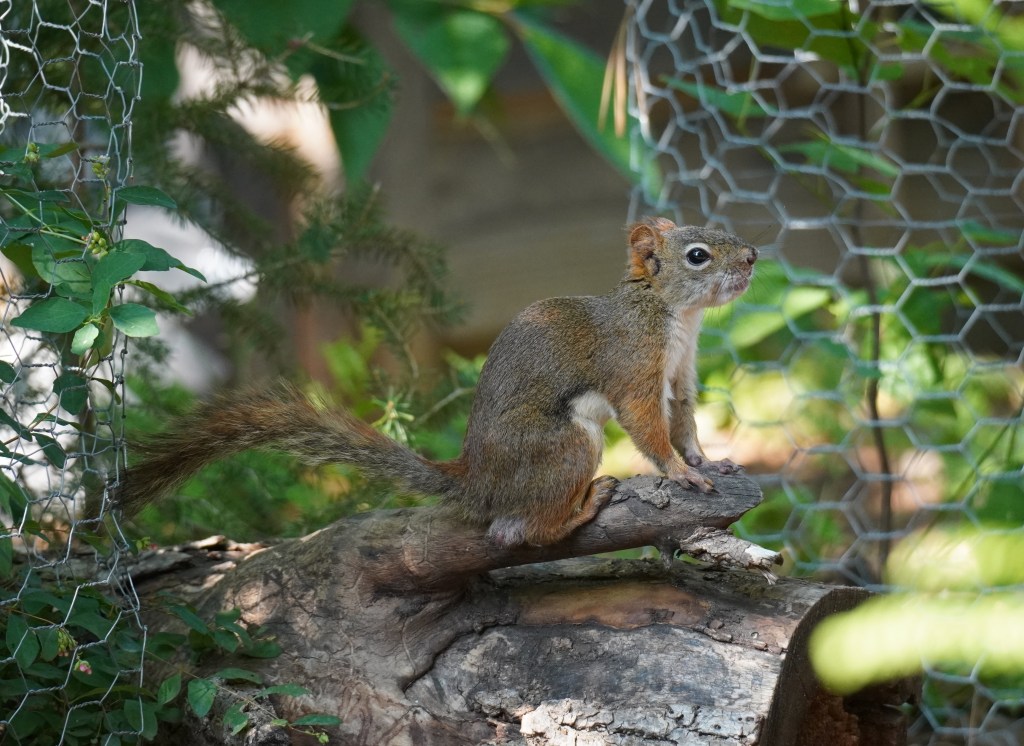
When Emerald Ash Borer killed all the Ash Trees in our yard, we left 2 as standing snags. One of them broke at the base and was leaning on wires, so we had to cut it down. We asked the arborist to leave the logs in the hedgerow. Before I got too far in planting the understory, we moved some Ash tree logs to the mini-forest, placing them on either side of the path. I often see logs like this on nature walks when a downed tree that fell across the path has been cut to allow passage. I think it makes my planting look more like a real forest. These logs have become a critter highway, especially for sparrows and squirrels.
The logs have also attracted a Northern Flicker. It now makes daily visits to chip away at the logs, to forage in the lawn and garden, and to drink in the stream.
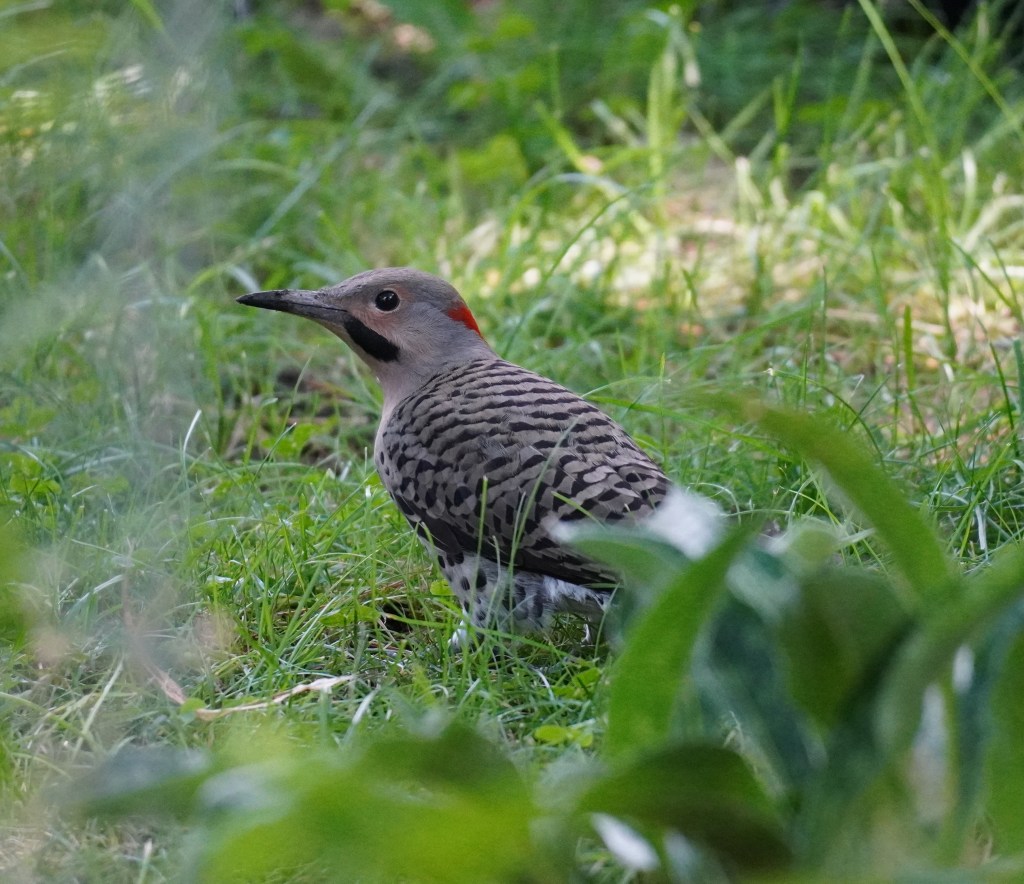


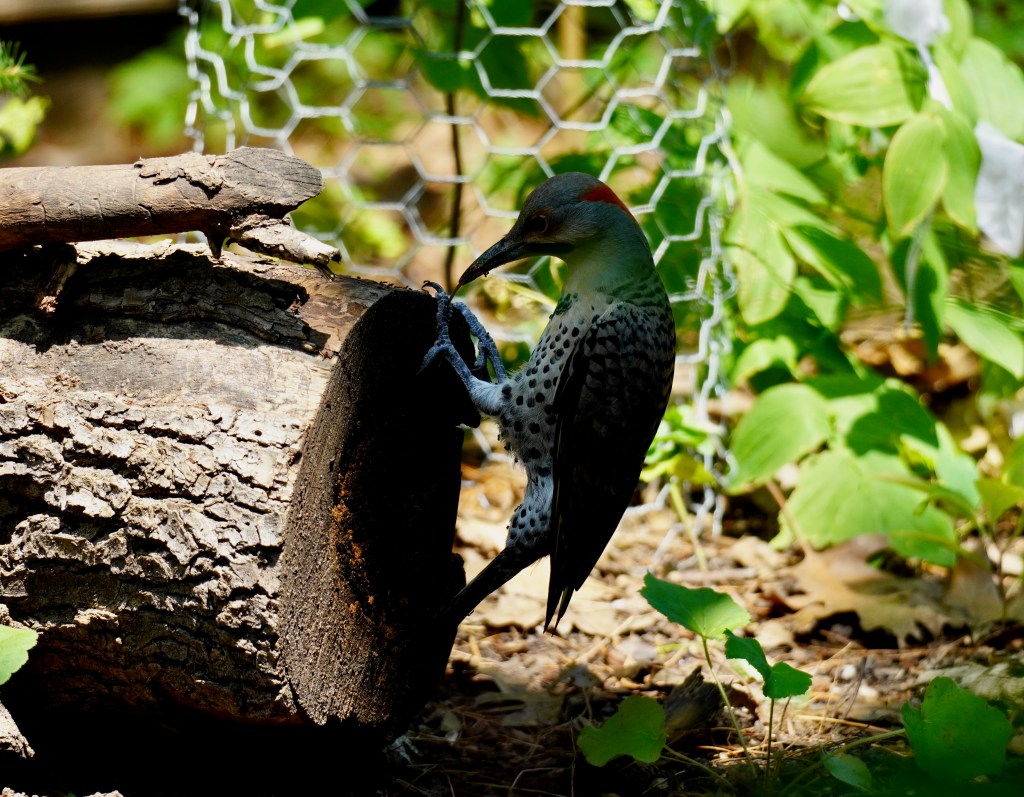
A Northern Flicker foraging for insects on the ground and in the logs (July 12 and 14, 2024). In the last photo, you can see its tongue stuck out; I think it found an insect.
Fallen deadwood has a lot of value in forests. They help with soil formation and nutrient recycling, and grow mosses, lichens, and fungi. They also improve biodiversity by being habitat for beetles, springtails, millipedes, spiders, and other insects. In turn, beetle larvae are food for insectivorous birds (like the Northern Flicker). While they are also shelter for salamanders and snakes, I doubt we will ever see them here. For more information about the value of dead wood for wildlife, see the PennState Extension article Dead Wood for Wildlife.
Maintenance
To mimic humus-rich forest soil, I added leaves to the garden in fall and again in spring. Whenever I cut back herbaceous and woody plants, I cut up the material with secateurs and scatter it around the mini-forest too.
Since we had frequent rain in the spring and early summer, I haven’t had to water much. Now that temperatures are rising and rain is scarce, I’m watering with a hose and sprayer. I focus on watering the trees and shrubs to ensure that they become established.
Perhaps because of the new mini-forest planting we noticed more bee activity in the spring, and more bird activity this summer. I always enjoy birding and botanizing outings on local forest trails. Having my own mini-forest right outside my doorstep is allowing me to observe insects and birds for a longer time and at a more leisurely pace. The mini-forest had been a wonderful addition to our yard for us and for wildlife.

I see frequent mentions of ” I ” and ” WE ” in the these wonderfully rich ‘articles’ complete with great photographs… but don’t see the name of the actual author
LikeLike
Go to My Garden, and then A Bit About Me for info. My name is Berit Erickson and I’m a recreational gardener that’s been switching from ornamentals to native plants in my yard.
LikeLike