
“I don’t know where to start.” I’ve heard this statement many times from neighbours who stop to chat while I work in my front pollinator garden. How can I help novice gardeners get from simply being interested in having a pollinator garden to actually creating one?
With this problem in mind, I made a few sample garden plans to use as a starting point. Then, this winter I stratified seeds for the plants in those plans. My intention was to give away seedlings along with plans at a school plant sale. Unfortunately, due to pandemic uncertainty, the school’s annual plant sale was cancelled.
Luckily, a keen friend came to my rescue. She volunteered to test out my ready-made pollinator garden idea in her front yard. Much to our surprise, we turned a patch of her lawn into a brand new pollinator garden in about 2 1/2 hours!
The plan
Last year, for a local community association, I presented a webinar on pollinator garden design. I walked viewers through my amateurish design process using one participant’s front yard as an example. I am certainly not a professional designer, but like I always say: “If I can do it, so can you”. I also included extra sample plans for different situations (shady garden, sunny garden, island bed, sidewalk). I used these existing plans for my ready-made pollinator garden idea.
Like our own front garden, my friend’s front yard is quite sunny and is also on a corner. In my plans, each square equals one square foot.
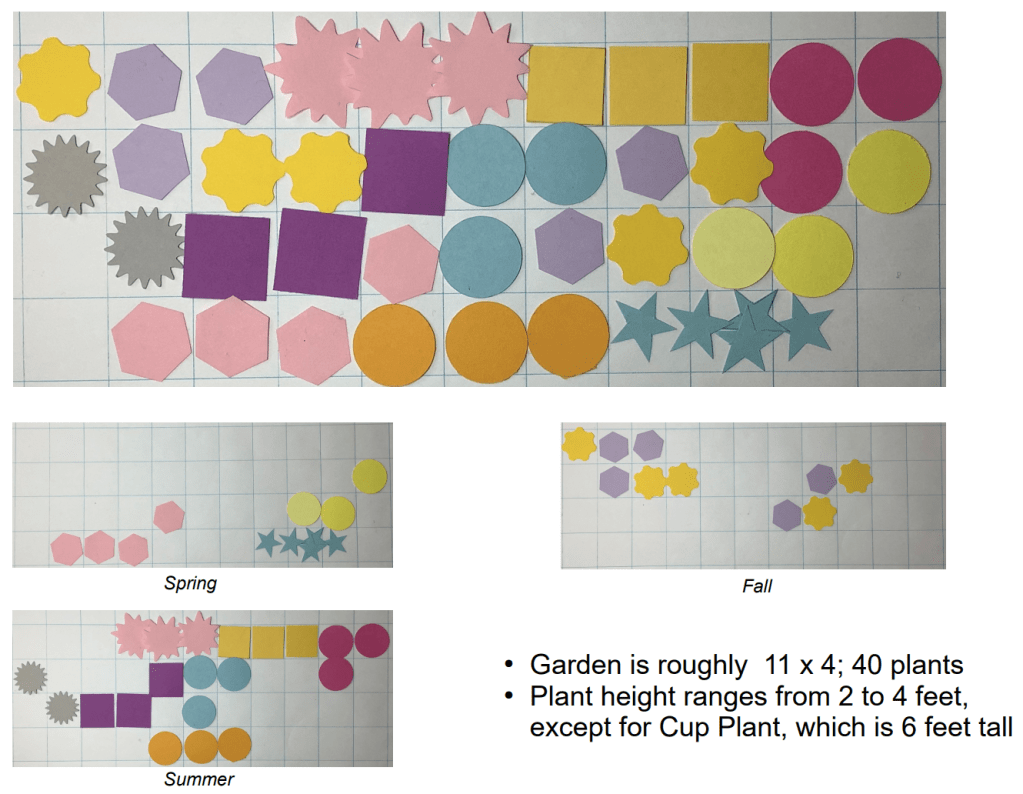
This plan is for a border garden: the tallest plants and the back, medium-height plants in the middle, and the shortest plants in the front. I placed butterfly host plants — Heart-leaved Alexanders (host plant for Black Swallowtails), Pearly Everlasting (host plant for American Lady butterflies), and Swamp Milkweed (for Monarchs) — around the edges to make it easier to observe caterpillars.
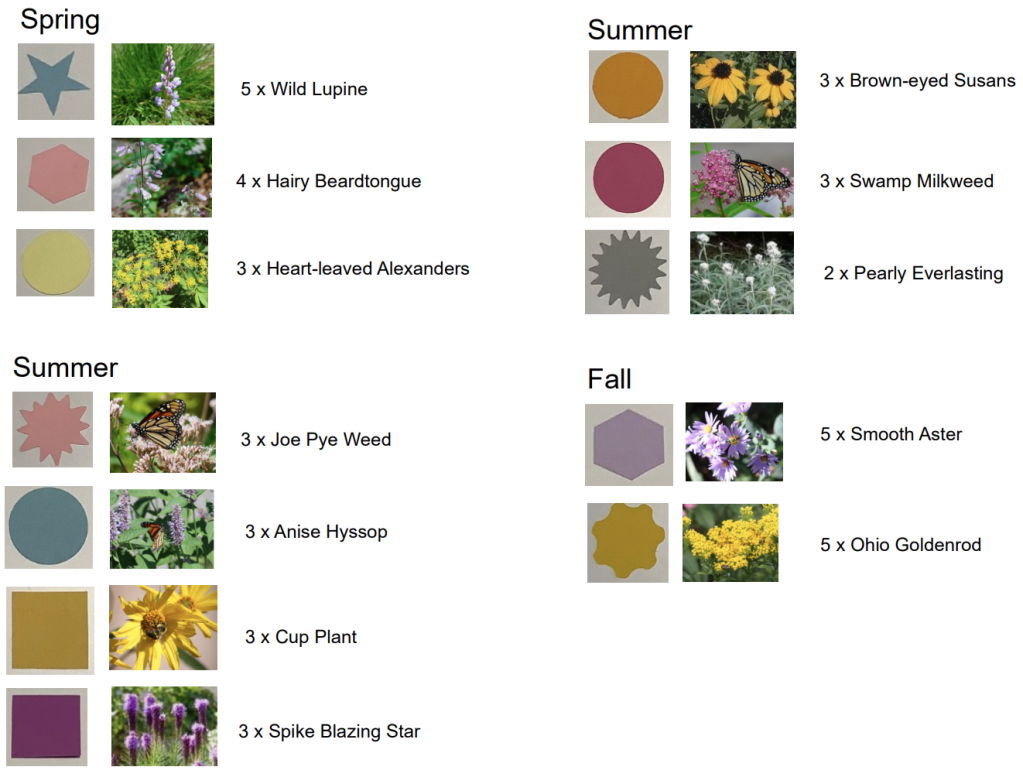
Cup Plant is a potentially controversial choice in this plan. I’ve heard from other gardeners that they spread and self-seed too much. In the 5 years that I’ve grown Cup Plants, I’ve only seen a couple of seedlings. Perhaps Goldfinches eat all the seeds in my garden? The plants stay in tidy clumps, although the clumps do get larger each year.
Heart-leaved Alexanders are a prairie native. I use them instead of Golden Alexanders because Golden Alexanders look a lot like Wild Parsnip, which is an invasive, toxic weed here in Eastern Ontario.
The plants
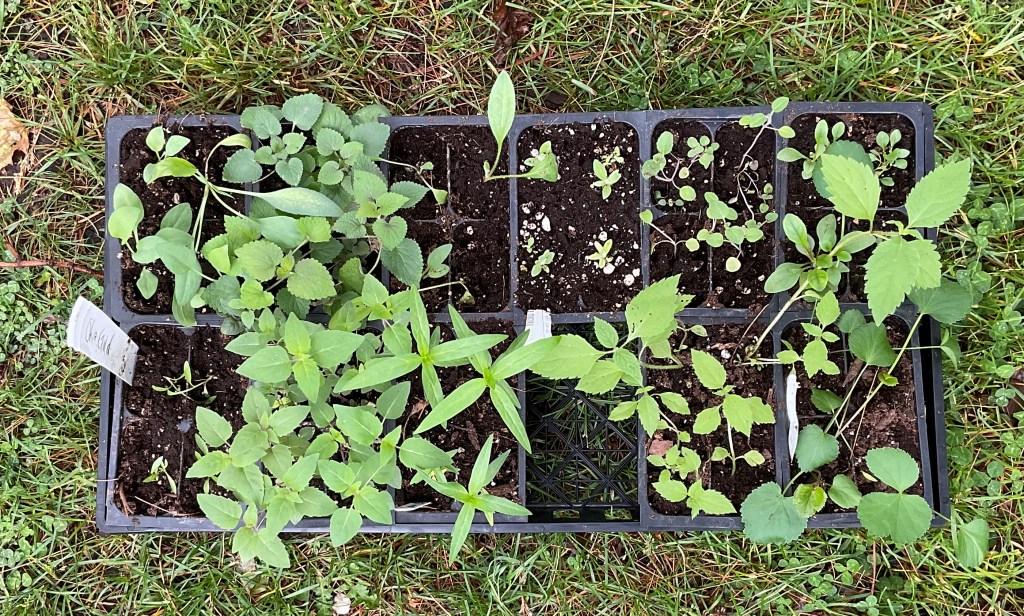
I used only native plants in this garden plan because they are particularly beneficial to native insects. Since I started growing the plants this winter, they are all still small seedlings. Honestly, few of them will flower this year, and the garden won’t look very impressive. There is a saying that native plants “sleep, creep, and leap”. In their first year, native plants don’t look like they’re doing much because they are ‘establishing’, meaning they’re growing their roots. In the second year, the plants will be bigger and most will flower. In the third year, the plants will be bigger still, will grow vigorously, and will be full of blooms.
For the first couple of years, I encourage gardeners to grow some annuals to make the garden more visually appealing and to provide some food for pollinators. Butterflies will still lay eggs on their host plants even if they aren’t blooming yet.
Lawn-be-gone
Abracadabra – lawn-be-gone! If only it was that easy. Well, actually it was that easy for my friend and I because her brawny husband dug out most of the grass for us.
For our comfort, we chose a cooler Sunday morning to work. Rain was also expected the following day. Planting in cool, overcast, and rainy weather reduces plant stress; transplanting can shock plants and make them more likely to wilt and struggle.
To begin, we dug out the perimeter using the measurements in the garden plan as our guide. Then, we dug out the sod inside our outline. We shook out the clumps of sod to save as much topsoil as we could. The sod clump remnants are destined for compost. Lastly, we leveled out the soil, adding in some extra purchased soil where needed. Fortunately, the soil beneath the sod has a loose, loamy texture, instead of being clay or sand.


Since the garden is in front of a cedar hedge, we left 3 feet of lawn between the hedge and the garden bed to allow easy access for trimming the hedge, and to provide a wide enough path for a lawnmower.
Planting
Voila, it’s time to plant the new garden! We used a shovel handle to draw grid lines in the soil to match the garden plan. Then, we placed the plants in the appropriate squares.
Next we made what proper designers call ‘field adjustments’ — we shuffled the plants around a bit so they weren’t all in unnatural straight lines. We also had more plants than were in the plan because my friend also wanted to add Purple Coneflowers. She had also bought packs of annual Blue Lobelia to add in the corners that are empty in the plan.
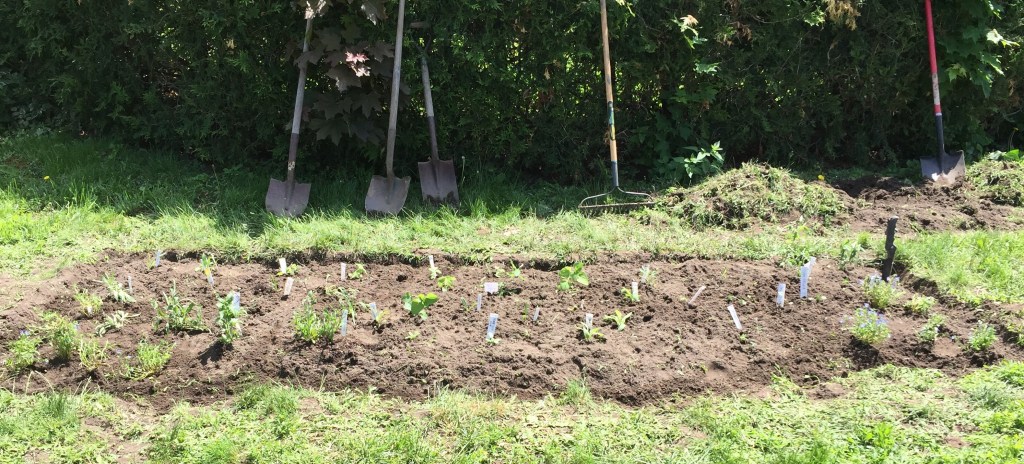
Almost done. We added labels for every single plant as a foolproof way to distinguish weeds from tiny native plant seedlings. I cut up large yogurt containers to make labels, and use a grease pencil to write the plant’s name.

Maintenance
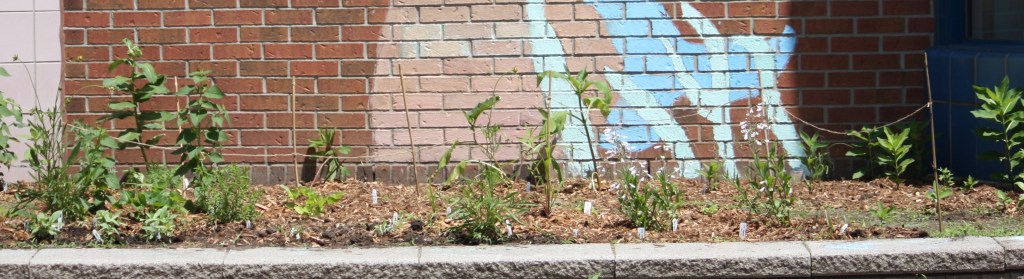
The following day after the rain, my friend topped her new garden with mulch. Mulch will help keep the soil moist, and will moderate the soil temperature. Leave a gap of an inch or two between plant stems and the mulch to prevent the stems from rotting.

If you are planting annual seeds directly in the garden, leave bare areas without mulch where you can sprinkle the seeds and cover them with a layer of soil (planting depth for each kind of seed is specified on seed packets). Alternatively, you can grow annuals and pots and plant them when they’re a few inches tall.
Weeding will be the main garden maintenance task for this year. By digging up the sod, we stirred weed seeds to the soil surface; now that they’re exposed to sun and rain, they’ll germinate. By weeding regularly and often this year, you deal with most of the seeds at the soil surface, so less weeding will be required in the future. Then, if you avoid disturbing the soil, you won’t bring any new weed seeds to the surface. As your native plants get bigger, they’ll also block light and moisture reaching any remaining weed seeds.
Beyond initial weeding, pollinator gardens are low maintenance. During fall, leave the leaves and stems intact. In the spring, cut back any dead plant stems that are still standing to a foot from the ground for cavity-nesting bees to use as nest sites. It’s also a good idea to tidy up edges of the garden bed with a Lawn Edger tool to prevent grass roots from spreading into the flower bed.
Once the native plants are established they will only need watering during particularly dry, hot spells. Native plants, and some pollinator-friendly annuals will self-seed. I find that self-seeding is controlled by leaving the leaves (blocking light from reaching the seeds). In my garden, I welcome native plant seedlings because they’re free plants to add to my garden or to share with others.
Future garden
The pollinator garden may not look like much now, but in a few months it will start to fill in when some of the native plants and the annuals bloom. To give you an idea of what it will look like later in the summer, here are a few photos of a school garden I helped plant in 2019.

Are you feeling inspired to make your own 2 1/2 hour pollinator garden this weekend? You’re in luck; here are some great sources for inexpensive native plants in Ottawa:
- Fletcher Wildlife Garden Online Plant Sale 2022 is open for orders
- Ottawa Wildflower Seed Library Plant Exchange, event on Saturday, June 4, 9am-12pm at Springhurst Park, and ongoing exchanges throughout the summer
- Beaux Arbres Native Plants at the Westboro Farmers’ Market, Saturdays, see their blog for details and the latest list of available plants
- Solidago Farm, will be at the Ottawa Artisans Summer Market, Sundays from 10am-3pm outside the St. Laurent Shopping Centre
- A Cultivated Art, this micro-nursery offers native plants for online ordering, pick-up in Vanier

Thank you very much for all the information and resources!!
LikeLike
Awesome article! And so do-able.
LikeLike
Brilliant! I’m creating a pollinator garden. It’s a large area and a bit daunting. Beds are marked out and already have some plants I’ve put in … and a lot of lawn grass left still go beto remove. If I were to clear out all the beds I wouldn’t have enough plants to fill in the gaps. Your instructions break the process down into managable parts. And they gave me the idea of planting annual flower seeds in the gaps as I remove clumps of lawn grass. Many thanks, and I hope you keep posting!
LikeLike
I’m so glad to hear that you found my blog post helpful. Good luck with your garden.
LikeLike
Thanks! It’s a great blog, wonderful photos, easy to understand, all the good stuff. My town is planning on planting a public pollinator garden. I’ll be sure to recommend your blog to help familiarize the town council with what is involved. And of course, I’ll tell my friends about it. Good luck to you too!
LikeLike
Thank you!
LikeLike
Great article. I have a question. I planted a pollinator garden last year. In the fall a farmer friend advised me to not do anything other than simply cut back the plants to about a six-inch height for the winter. Do I need to do anything else to the plot this spring?
LikeLike
You can read how I approach garden clean-up in a blog post I wrote last year called “Less is more: spring pollinator garden clean-up”: https://wildpollinators-pollinisateurssauvages.ca/2023/04/25/less-is-more-spring-pollinator-garden-clean-up/
LikeLike